Introduction to Planograms
Planograms are visual aids, depicting the physical layouts of your market inventory. You can use planograms to ensure that products are placed in your markets where they will sell the best. To learn more about merchandising and maximizing product placement within your market, consult the Executive Professional, Analyzing Market Demographics & Merchandising module in AIMEE.
In this module you will learn how to create planograms using AMS. You can add and remove rows/shelves and columns/slots to customize each planogram to match your market equipment. You can then drag and drop products into your planogram.
Currently, each planogram is for a single display/storage unit, being one cooler, freezer, or snack rack. You will create multiple planograms for a single market.
Once in your market, the driver can use the kiosk’s Administrative Menu, and select the View Inventory or Planogram option to prepare each rack, cooler, or freezer at that location.
Creating planograms in AMS
On the AMS DASHBOARD, click MARKETS, and then select LOCATIONS.
Click a location in the list to open it.
Click the Planograms tab, and then click NEW PLANOGRAM.
Enter a name (see the following recommendation), and then click the + – to add/remove row (shelves/racks) and columns (shelf-slots) to your planogram, and then click SAVE PLANOGRAM. Be sure to match the number of shelves and slots that are present in the market’s equipment for which you are making this planogram.
Recommended Naming Convention:
Manufacturer/Equipment Type/Model, Number of Unit (for example, 1 of 6, 2 of 6, and so forth).
For example:
Avantco GDS-47-HC Drink Cooler 1 of 3, or Pepsi Beverage Cooler 2 of 2, or Snack Rack 1 of 2.

Navigate the Product List on the left-side, and then drag and drop products into its proper place on the planogram. Each product will create tiles in your planogram.
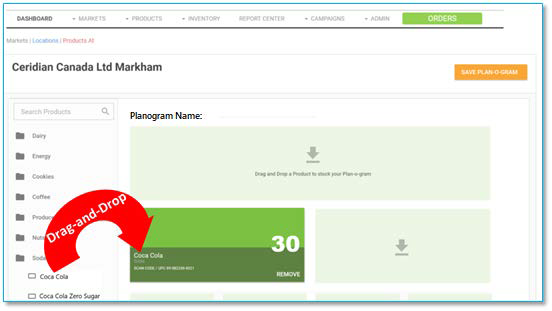
Repeat for all products you want stored in this display unit, and then click SAVE PLANOGRAM.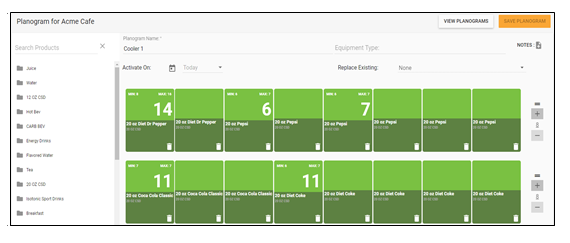
Repeat these steps for all display units in this market location, creating a separate planogram for each display unit.
Adjusting Planograms
To edit your planogram, do the following:
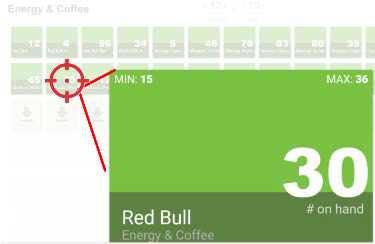
Click a tile to view the product name, Min/Max levels, and On Hand values. Some larger tiles will display product group/category and scan code.
NOTE: You will only see the number of units on hand for the first instance of a product in that planogram.
Click the trash can icon in any product tile to remove it from the planogram.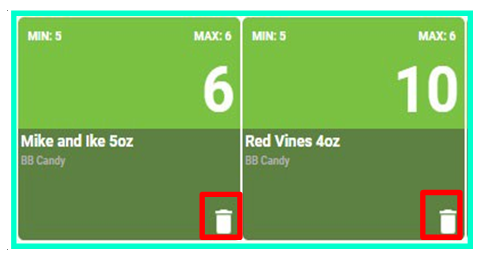
To replace a product in the planogram, drag and drop a new product from the left-side list over an existing tile in the planogram.
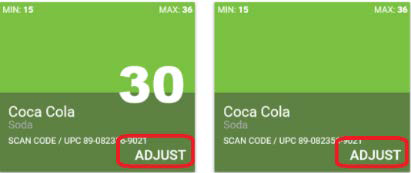
Click ADJUST in any of the product tiles to adjust inventory levels.
Once your AMS syncs with your market’s kiosk, the planogram will appear in the market’s kiosk ADMINISTRATIVE MENU, in the View Inventory & Planograms option.
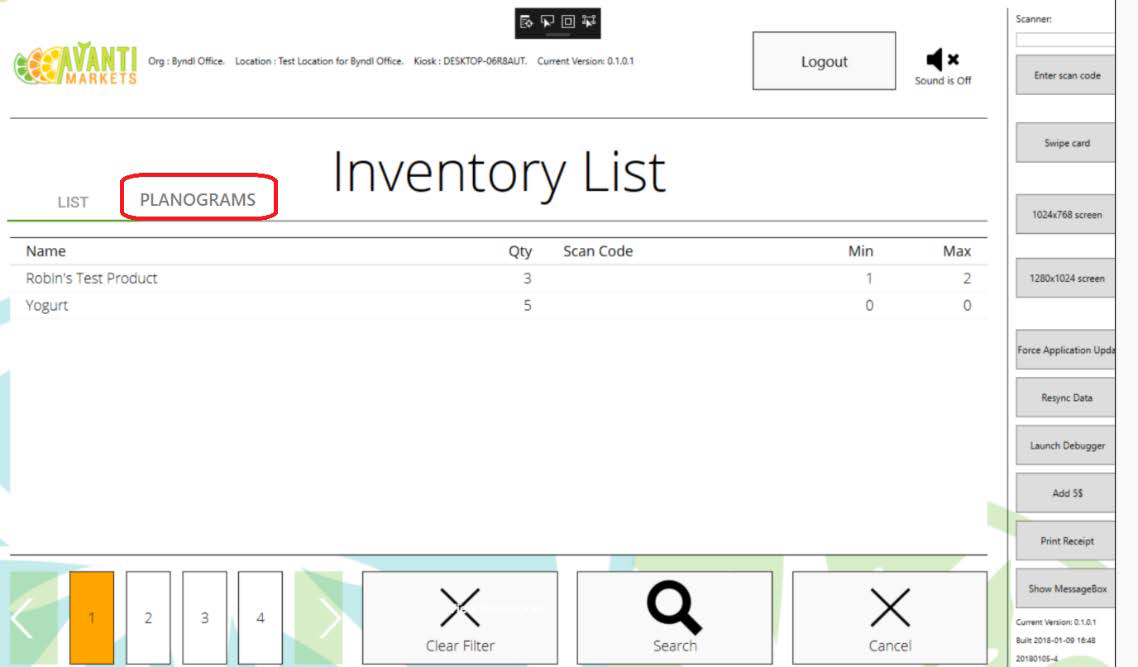
Viewing all Planograms in AMS
To view all the planograms for a location, click the PLANOGRAMS tab.
A list of planograms for that location appear in the left-side pane (seen below). You can enter a planogram name in the search bar or scroll the list to find the planogram, and then click the name in the list to open.
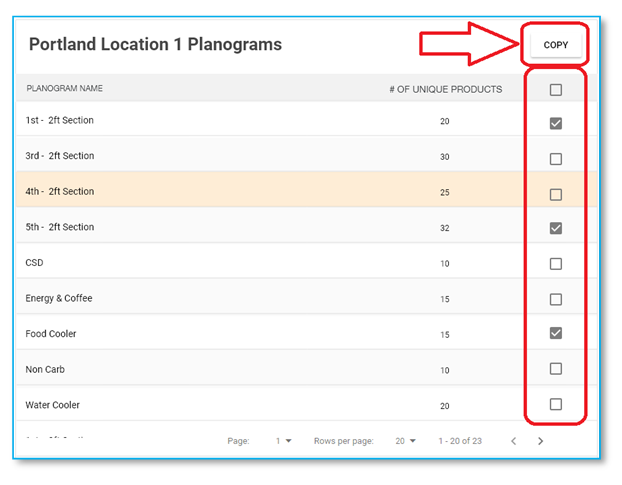
How to Copy Existing Planograms From Another Location
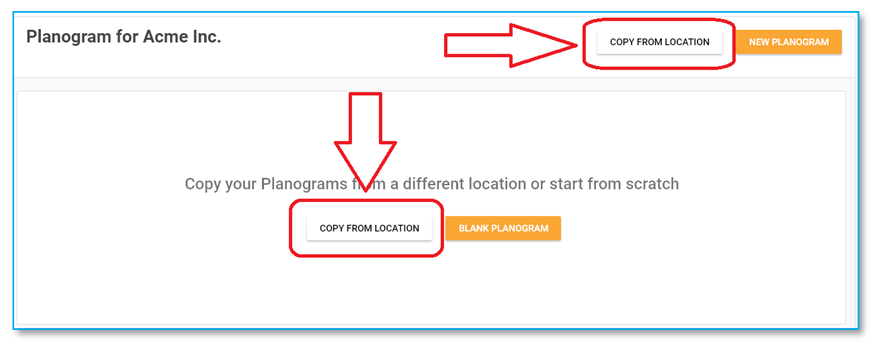
Once you have created at least one Planogram at a location you will see the COPY FROM LOCATION
button when you attempt to create a planogram at a location.
Once you have done so, go to a Markets > Locations > Location Name > Planograms
To copy a planogram from a different location click COPY FROM LOCATION
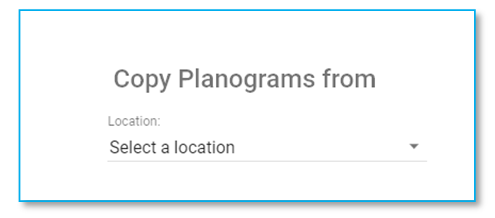
Use the dropdown to select the location you would like to copy planograms
Choose the planograms you want to copy by clicking the checkbox on the right, then click copy.
Note: you can select all planograms at the location by clicking the checkbox in the top right.
If there are products in the planogram that are not at the new location you are copying the planogram to, you will see a list of these products once you choose to copy the planogram.
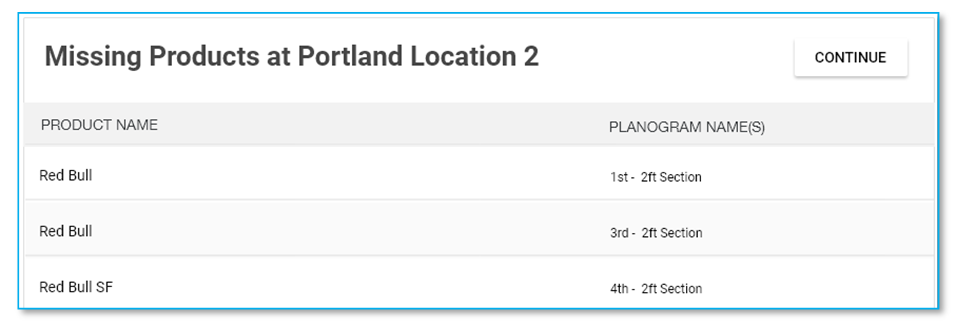
Take note of these products as they will not show in the new planogram.
Note: You will also be notified which planograms the missing products are a part of.
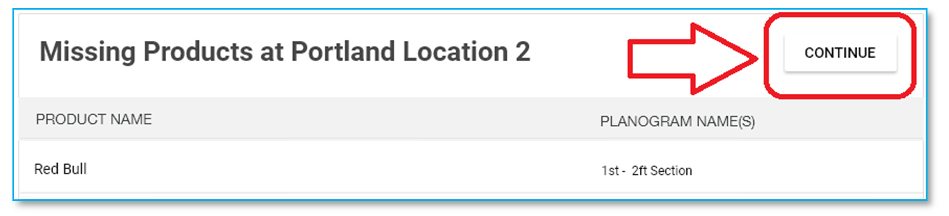
Click CONTINUE and all the planograms that were selected to copy to your new location will now be visible to edit/duplicate/remove.
For each planogram add or edit products as needed to modify the planogram to correctly represent all the products that should be in the planogram at that
Editing/Deleting Planograms
1. To edit a planogram, in the left-side menu, click a planogram name in the list, and then click  .
.
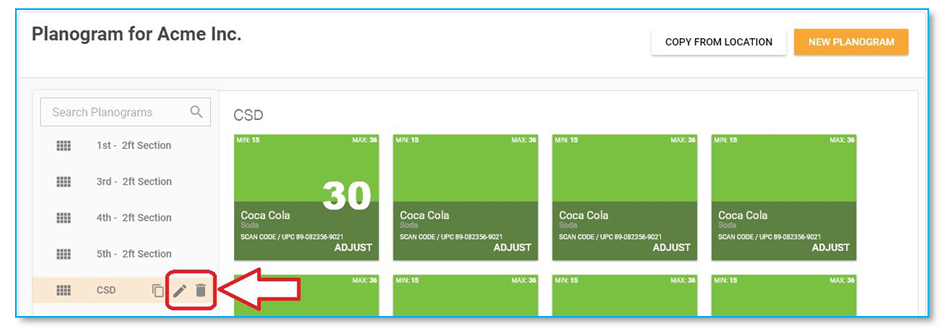
2. To delete the selected planogram, click  , and then click Yes to confirm.
How to Duplicate a Planogram
To duplicate a planogram, in the left-side menu, click a planogram name in the list, and then click .
This will create an exact copy of the planogram with the same name and append the new planogram name with the text “Copy”.
To edit the name, click and modify the name as

How to Reorder Planogram Rows
Once in editing mode, select use your mouse to select the two “grab lines” above the cell
Drag the row up or down to change the location of the row. All cells in that row move with the row.
Select the Save Planogram button when you are done editing to save your changes.
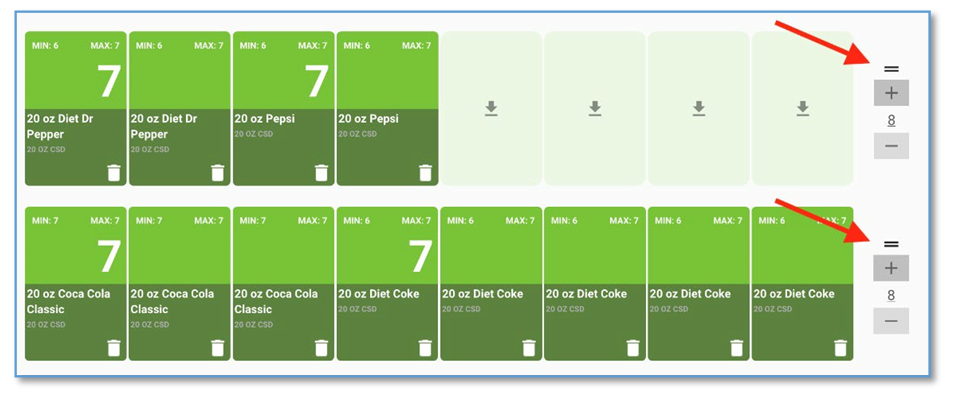
How to Reorder Planogram Cells
While in editing mode, click and hold a cell in your planogram (you can click anywhere in the cell)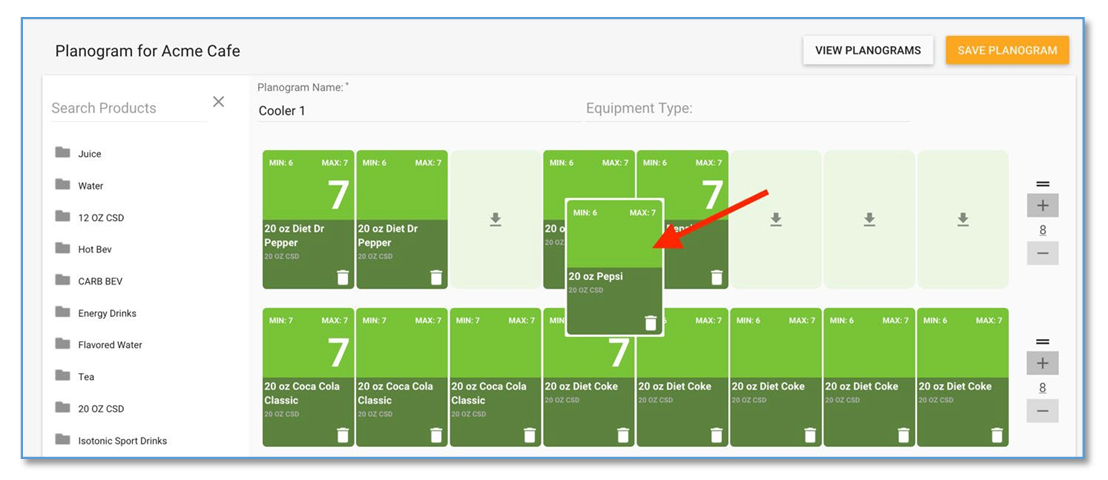
Drag the cell to an empty slot to move the cell, or drag the cell to an existing cell to see options
How to Swap an Existing Product with a New Product
Select and hold a cell so you can drag Instead of moving the existing cell to an empty slot, move it to a slot that’s filled by a product that you want to swap.
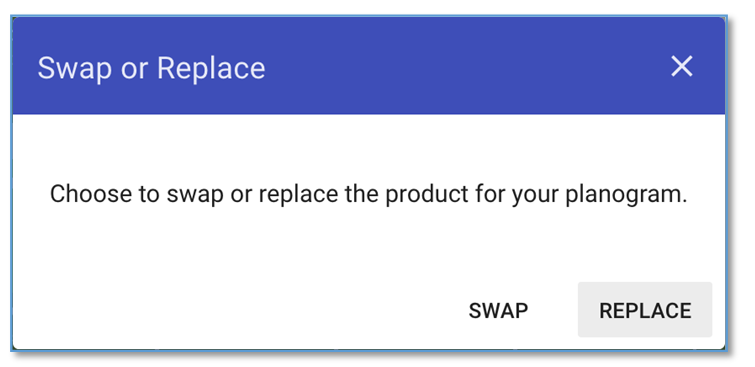
A dialog box appears. Choose the option to SWAP.
The product locations are now reversed. Select save to finalize your
How to Replace an Existing Product with a New Product
Select and hold a cell so you can drag Instead of moving the existing cell to an empty slot, move it to a slot that’s filled by a product that you want to swap.
A dialog box appears. Choose the option to REPLACE.
The product you selected now replaces the product that was in the cell. Select save to finalize your
How to View Changes to a Planogram
Open any planogram
If a product has been added, moved or replaced the cell will have a notification icon in it
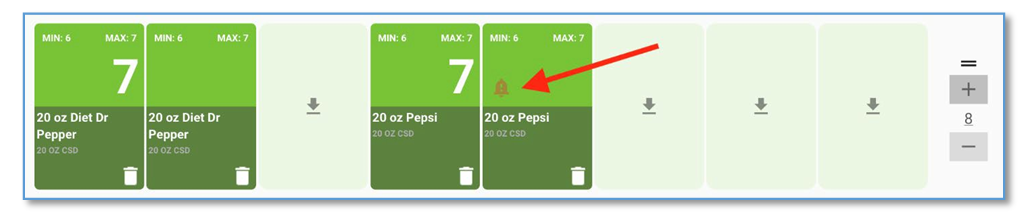
Note: The notification icon will be shown on any changed cell for seven days and will disappear automatically after seven days.
How to Print a Planogram
Ensure you are not in edit mode for the planogram
Select PRINT PLANOGRAM
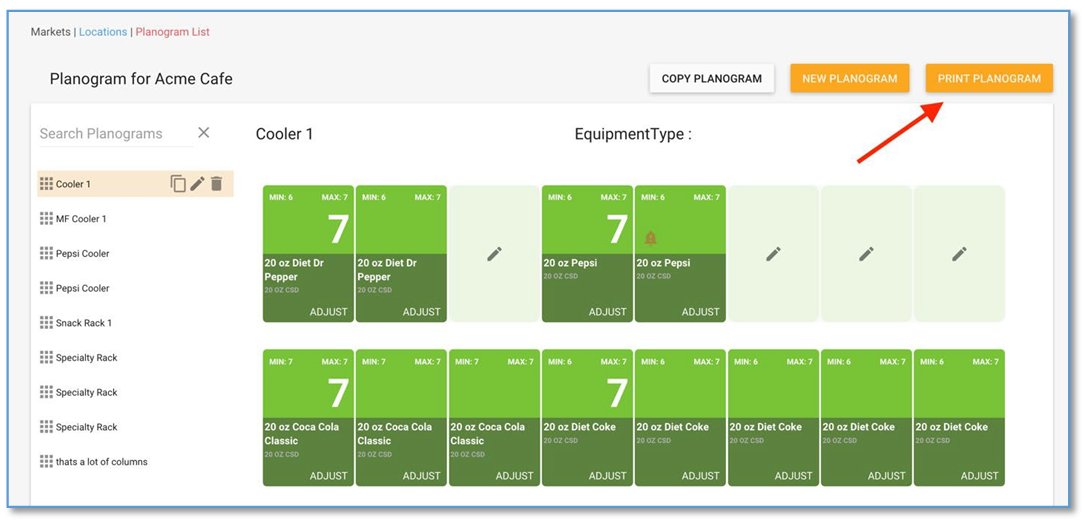
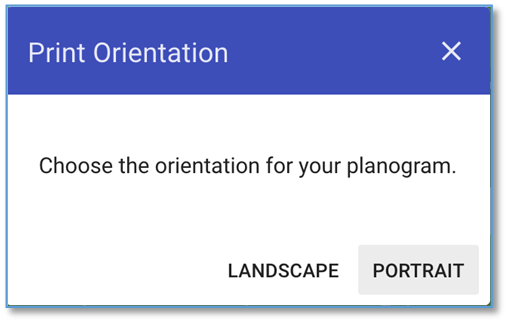
You are shown an option to choose Portrait or Landscape format
A PDF of the planogram will be You will see options allowing you to open the PDF or save it. You can open and print the PDF.
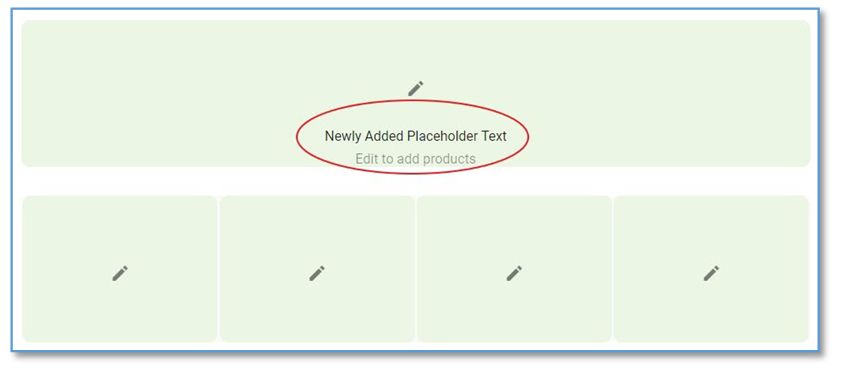
How to Add Placeholder Text
In Edit mode, each cell has a field called Placeholder Text.
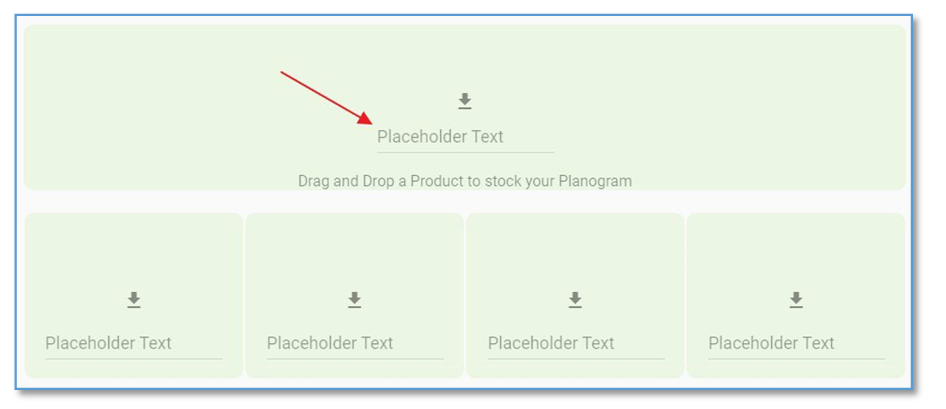
In Edit mode, add text that you want to display in an empty cell once the planogram is saved
Click Save Planogram
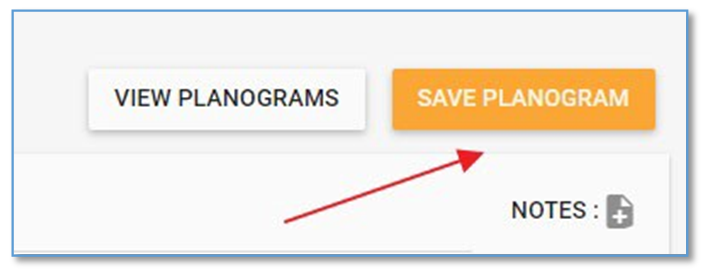
Click View Planogram
The empty cell will now contain the text you added
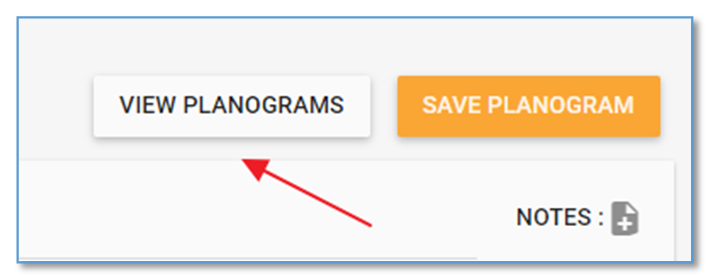
How to View or Add a Note
In View mode notice the note label and icon in the top right corner of the planogram page under the orange buttons.

In View mode click the note icon to get a modal window with the note for that planogram
In edit mode notice the note label and icon with a plus in the top right corner of the planogram page under the orange buttons

In Edit mode, click the note icon with the plus to activate a popup window where you can type notes
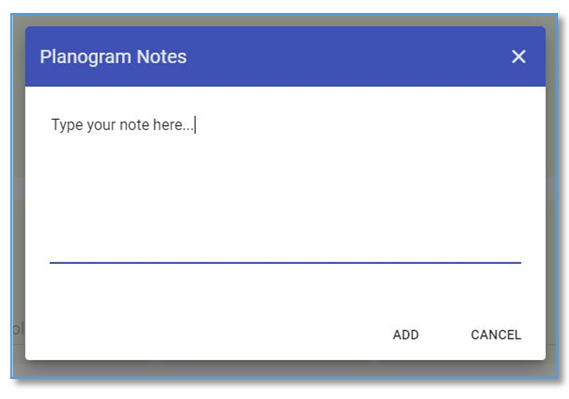
Click ADD to add the note to the planogram
Helpful Hint: If you do not save the planogram, the note will not be saved. Notes are also viewable on the printed version of your planogram.
How to Stage a Planogram to replace an existing planogram in the future
In View mode you will notice there are two tabs on the left-hand side of the screen. ACTIVE and INACTIVE
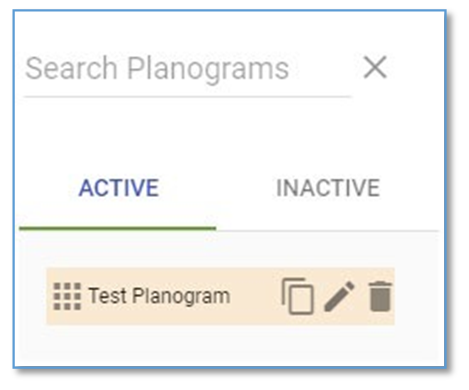
Active Planograms are those which are live for the selected location
Inactive Planograms are those which are staged to replace an active planogram at a later time in the
Click New Planogram to create a new
Notice there are two fields under the name of the planogram. These two fields will control when a planogram is replaced and which planogram it replaces

Select the date you wish the planogram you are creating to replace an existing planogram
Next, choose the planogram from the Replace Existing dropdown that you want replaced on the date selected in the previous
Add products and placeholder text as desired and save the
Notice, the planogram now shows up in the inactive tab.
The existing active planogram will be replaced on the date selected and be reflected in AMS, on the Kiosk, and
Helpful Hint: You cannot delete an Active planogram that is set to be replaced. In order to delete an active planogram that is set to be replaced, you must first delete the inactive planogram that is set to replace it.
How to Adjust Min/Max from the Planogram Tiles
In View mode, double click on a tile for a product you want to adjust the min/max

Notice the Edit Min/Max button at the top of the tile
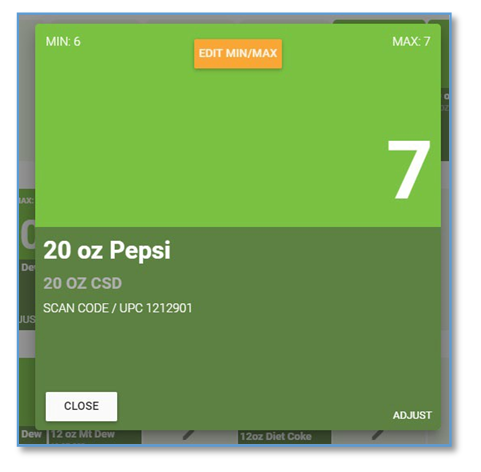
Click the Edit Min/Max button
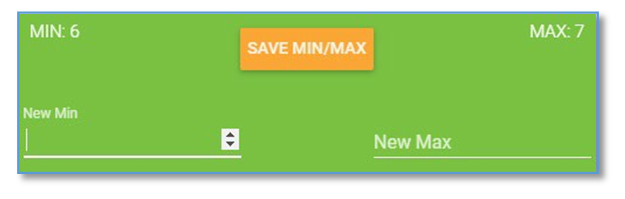
Enter the new Min/Max values
Click Save Min/Max button
Your updated min/max values are now saved
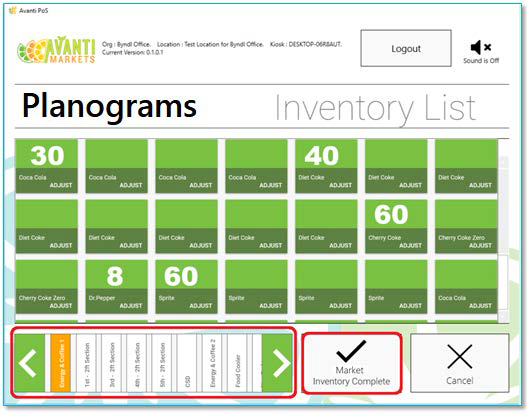
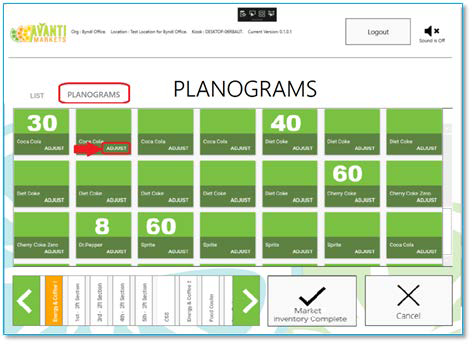
Accessing planograms from the kiosk
Drivers can see all planograms for all markets using the onsite kiosk touch screen.
Log into the kiosk’s ADMINSTRATIVE MENU, tap the View Inventory & Planograms tile, and then tap the PLANOGRAMS tab.
On the PLANOGRAMS screen, each tile displays the following information about a product in your display unit:
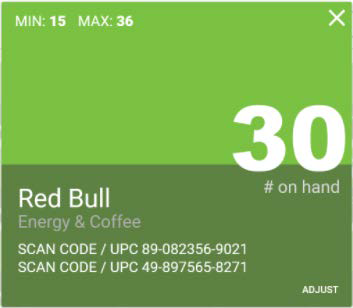
• Min/Max levels
• On-hand value (this value appears only on the first tile for that product in a planogram)
• Product name
• Product category
• Product scan code(s)
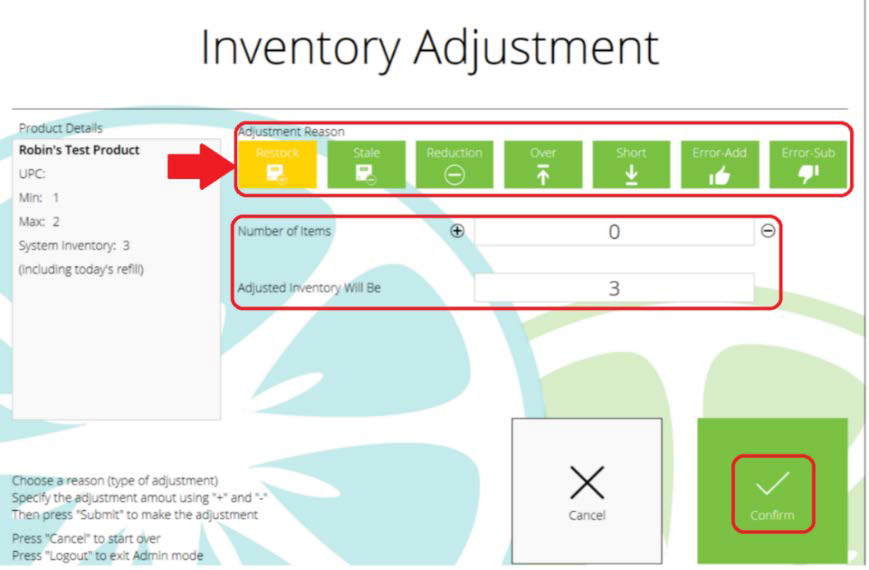
Tap ADJUST to change inventory levels (on-hand values).
The Inventory Adjustment screen appears, where you can tap ⊕ change values to match levels in the market and tap adjustment reasons (restock, stale, reduction, over, short, e-add, e-sub) to assign, and then tap Confirm.
Select the next unit’s planogram in the list on the bottom of the screen (tap < > to scroll the list), repeat the previous steps accordingly, and then once you complete inventorying the ENTIRE market, tap Market Inventory Complete.