Once you have completed your preparation call with Avanti to ensure you are prepared to enable your VMS integration you will need to schedule an onboarding webinar with your Account Manager.
VMS Onboarding Call
Please be sure to have the following prior to the onboarding call. The initial onboarding VDI call will take approximately 30 minutes.
During the initial onboarding Avanti Markets will show the operator how to use the self-service VMS tools.
- Reach out to your VMS provider to ensure you are setup for Micro Markets.
- VMS Organization ID – You will need to provide your VMS Org ID to Avanti Markets to enable the VDI integrations.
- Your market location must be created in VMS and products added to the planograms.
- Please be prepared to provide the VMS location ID that will needed to be added in the VMS tools location record.
Important Note: It is very important that you provide the correct Organization ID to Avanti Markets to enable the VDI integration. Delays enabling the VDI integration will occur if this information is not entered correctly into AMS.
Onboarding Steps
Avanti Markets enters operators VMS Organization ID at the organization record. This step is completed by an Avanti Admin.

Select the VMS Provider and select Update Button. This step is completed by Avanti admin.

Once the update is complete the operator Organization is now VDI enabled. The VMS Self-Service tools are now available in AMS under the admin tab for operator access.
Select VMS TOOLS in the admin tab dropdown.

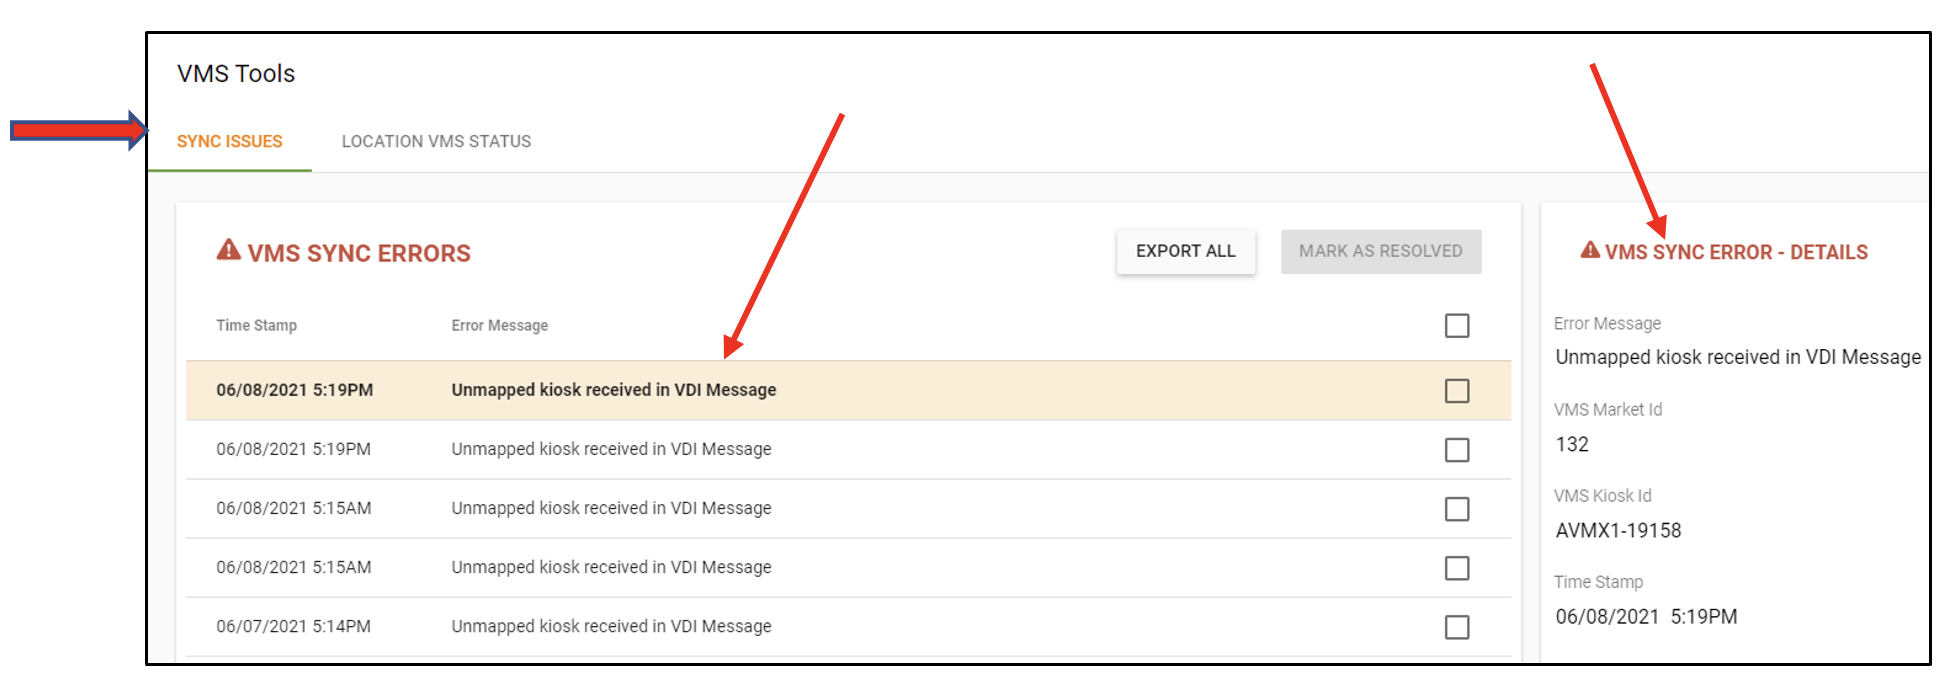
You will be presented with the VMS Sync Errors. If any location mapping errors exist they will be visible on this page.
If you highlight the error message you will see the VMS sync error details will be visible on the right side of the screen.
The error messages displayed in AMS if a VMS market is setup with your VMS provider and Avanti Markets is flagged as the micro market provider. If the market location or kiosk are not enabled in AMS the error will be visible.
The error messaging allows you to investigate to see if there is a potential issue.

To enable your market location to VMS follow these steps.

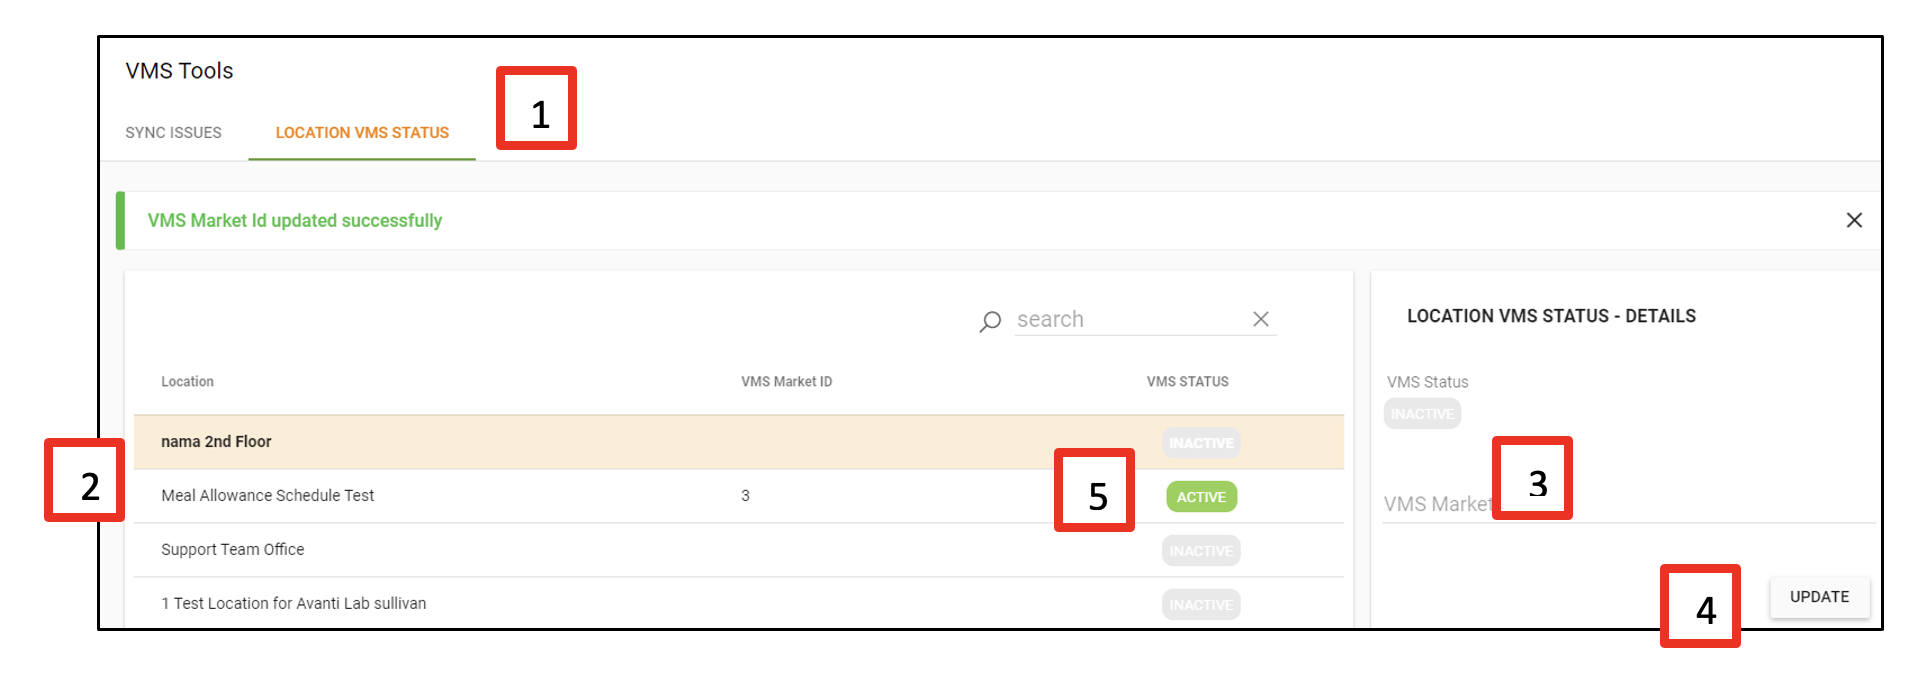
- Click on location VMS status
- Highlight the market location you want to enable
- Enter the VMS location ID in the VMS Market ID field
- Click update
- The market location now shows the “Active” indicator
You will want to ensure everything is setup correctly prior to having the product payload sent from your VMS provider to AMS.
Go to the location tab in AMS and query themarket location. Please notice the VMS identifier tag next to the to the right side of the Meal Allowance Schedule Test location.
VERY Important: Please select the location and ensure that the kiosk records have the VMS identifier highlighted next to each kiosk.

Next go to the market location and select the “products” button.

Once you open the product list scroll to the bottom of the product list and make note how many products are associated with the market you are enabling to VMS. Please note there are 339 products associated with the AMS market prior to the VMS integration being completed.

You will now want to go to your VMS providers web portal and follow these steps.
Once logged into your VMS portal you will want to manually send products from VMS to AMS.
Please reach out to your VMS provider for instructions how to complete this task
It will take approximately 5 to 10 minutes for the VMS product list to propagate AMS
Confirming the market has been successfully enabled for AMS. Expected behavior:
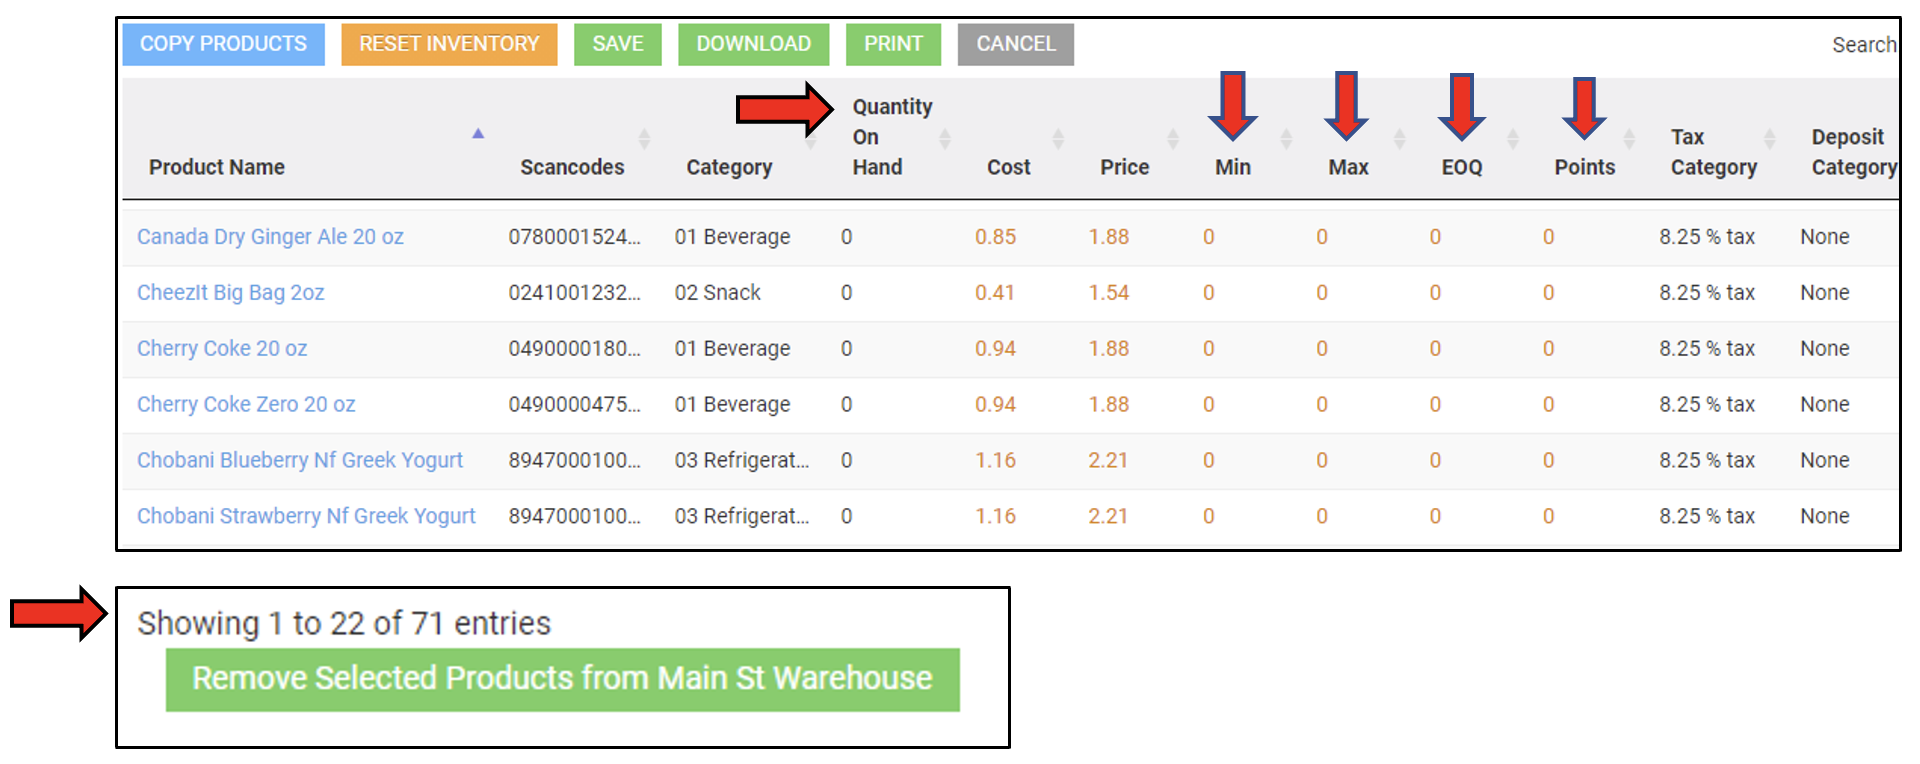
- Notice the Quantity on hand figures have changed to zero. QTY OH figures will not be visible in AMS. QTY OH figures will go negative once the market is enabled to VMS.
- Min/Max Par levels, EOQ and points will be changed to zero in AMS.
- The tax category associated with the VMS location will be updated in AMS. Note the products were changed from Taxable to 8.25% in our example.
- Lastly the total number of products added to your VMS POG will override your product list in AMS. Note the number of products at the Main Street Warehouse in AMSD changed from 339 products to 71 products after the integration was enabled.
- After the market is enabled to VMS product sales that occur at the kiosk will propagate your VMS provider. There is a delay of approximately 5 to 10 minutes from the time the purchase is made at the kiosk to reach your VMS provider.
- You will need to perform a market inventory using your VMS provider tablet or smart device.

You have successfully enabled your market to VDI integration. Please reach out to support if there are any issues during the process.