Overview
The bill acceptor on a V5 MicroMarket (with cash acceptance) is housed in the XP module, along with the receipt printer. The XP module has its own power cable that comes out the back of the XP module. The XP module then connects to the kiosk via USB and COM/serial cables. The receipt printer uses the USB connection. The bill acceptor uses the COM/serial connection.
This article will cover coupon programming, troubleshooting, and testing the MEI CPI Talos bill acceptor, which is a new model of bill acceptor ONLY for the V5 MicroMarkets. The MEI CPI Talos bill acceptor model will replace previous models and be used going forward on the V5 XP units.
Test Bill Acceptor in Kiosk Setup App
The bill acceptor should register in the provisioner/setup screen. You can test the bill acceptor in that screen.
- From the point of sale screen, tap the upper left corner of the screen 5 times to access the Driver Menu (approximately where the logo is).

- Enter your driver PIN and click Login.
Note: A driver's PIN is set in the Users & Roles section of ADM. If you do not have access to this section and need your PIN set/reset, reach out to your management.
- Tap Relaunch Kiosk Setup App.

- You will receive a message that asks if you're sure you want to relaunch the Kiosk Setup App. Tap OK.

- Tap OK on the Welcome! pop-up.

- Tap Test Devices.

- De-select all other devices except the Bill Acceptor, then tap Begin Testing.

- You should be prompted to insert a bill. You will receive either a success message, failure message, or a message stating that the bill acceptor is not detected.
- Success: The bill acceptor validated the bill and accepted it properly.
- Failure: The bill acceptor is being detected by the kiosk but is not accepting bills. Check for bill jam.
-
Bill Acceptor Not Detected: This is likely due to a physical connection issue.
- Once you've received a success message, you will be directed back to the Kiosk Setup App. Click Start Kiosk to load the point of sale.

Program MEI Bucks (Coupons)
The MEI Talos bill acceptor can be programmed to accept MEI Bucks (coupons).
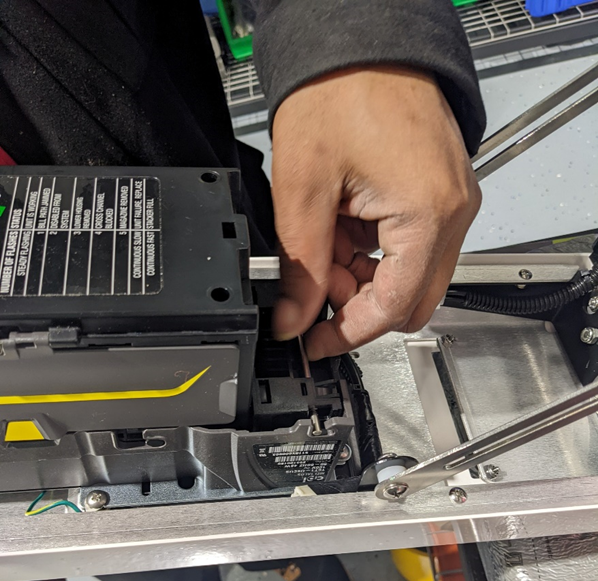
- Unlock the t-lock on the XP module.
- Remove the bill cassette. To do so, push the yellow tab on top and pull the cassette out.
- Insert a pen or paper clip into the hole on the upper portion of the bill acceptor. The front indicator light will blink rapidly.
- Re-insert the cassette.
- Insert the MEI Buck. The MEI Buck will be ejected back out and then the front indicator light will blink 10 times.
- The front indicator light will begin rapid flashing. Remove the bill cassette and re-install. The indicator light will slow flash to indicate it is in test mode.
- Insert the MEI Buck and it will be accepted and held in the bill cartridge. The indicator light on the front of the bill acceptor will turn off. The configuration is complete.
Troubleshooting
Not Accepting Cash for Funding
- Log into consumer account and tap FUND WITH CASH.

- The front indicator light on the bill acceptor will blink (it may take about 10-15 seconds for the hardware to register and starting blinking). When the bill acceptor starts blinking, this indicates that it is ready to accept cash. Insert the bill.

- If the bill is rejected, close the Fund Account window and then reseat the bill cassette. To reseat the bill cassette:
- Unlock the t-lock and open the XP module.
- Press the yellow tab and pull the cassette out.
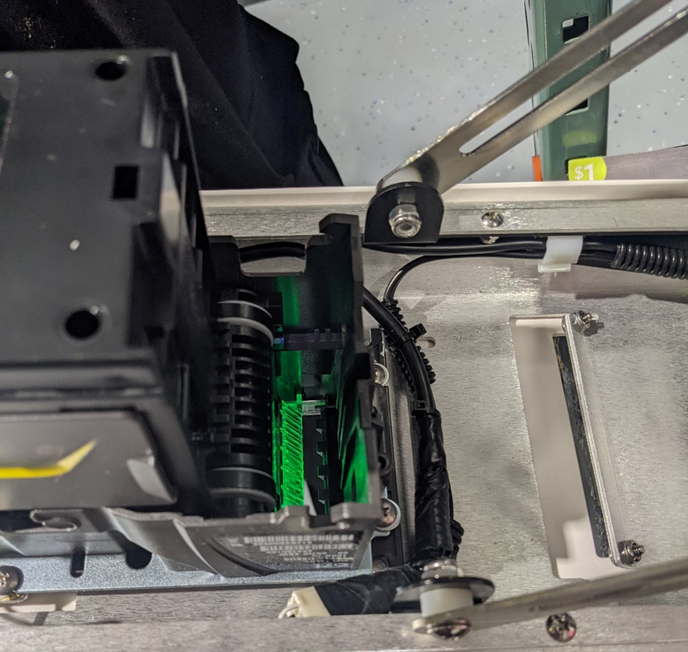
- Insert the cassette again, making sure it is securely in place. The side of the cassette with the opening/door should be facing the right of the XP module (as seen above). If a bill jam is seen during this process, refer to the Clear Bill Jam section.
- Close the XP module, then reopen the Fund Account window and reinsert the bill. Once the bill is inserted and registered, allow 10-15 seconds for Fund Account window to update the Cash Added field with bill denomination you inserted.

Rejecting Bills
Check for bill jams and use a can of compressed air to clear any debris or dust from the bill entry point should be done if the acceptor is not taking bills.
Bill Acceptor Not Detected in Kiosk Setup App
When testing the bill acceptor in the Driver Menu, you may receive a message stating that the bill acceptor is not detected. Follow the steps below to check the physical connections.
- Verify the power cable to the XP unit is plugged into an outlet.
- Verify the bill acceptor is plugged into the left side of the kiosk via COM/serial port.
- If all connections are secure, reboot the kiosk and the bill acceptor.
- The kiosk can be rebooted from the Driver Menu or the power button on the right side of the kiosk.
- The bill acceptor can be power cycled by unplugging the power cable for the XP unit for a few seconds, then plugging it back in.
- If the bill acceptor is still not detected within the Driver Menu testing tool, reach out to 365 Support.
Clear Bill Jam
- Unlock the t-lock and open the XP module.
- Locate the silver bar at the bottom of the bill validator. Pull on the bar. This will release the entry gate on the bill validator. Lift this piece up and out of the way.
- Clear any bills that are jammed in the unit. Once cleared, replace the entry gate on the bill validator and make sure it is seated firmly in position.
- Close the XP module and lock the t-lock. Test the bill acceptor by funding a consumer account or by testing in the Kiosk Setup App.