Introduction
This document will assist you in installing the Monnit ALTA gateway and sensor(s). Before you begin you should have:
- Received your sensors
- A live and active internet connection
- Kiosk keys
- An active email address to receive sensor notifications
Tools Needed
If you have a different gateway than the one pictured below, you may be dealing with the MonnitLink gateway and Monnit WIT sensor(s). For more information on the Monnit WIT device, see the Imonnit Link - Gateway and Sensor Physical Install Guide.

Opening the Kiosk
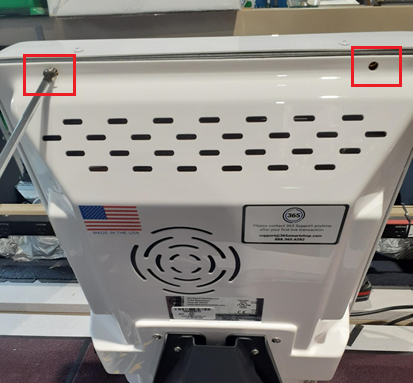
- Begin by removing the two screws shown here with a #2 Phillips screwdriver. This will allow you to open the kiosk.
Remove Gateway and Sound Bar
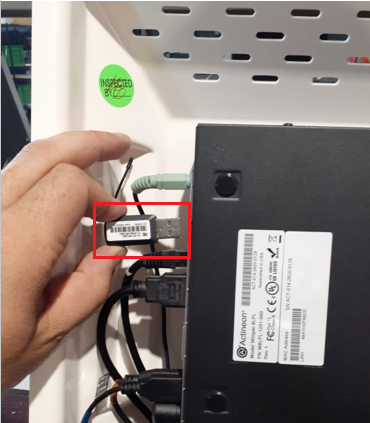
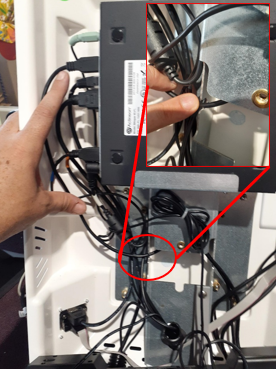
- Locate the old USB Gateway and remove it from the kiosk. Take note of the location as you will use it later to power the new unit.
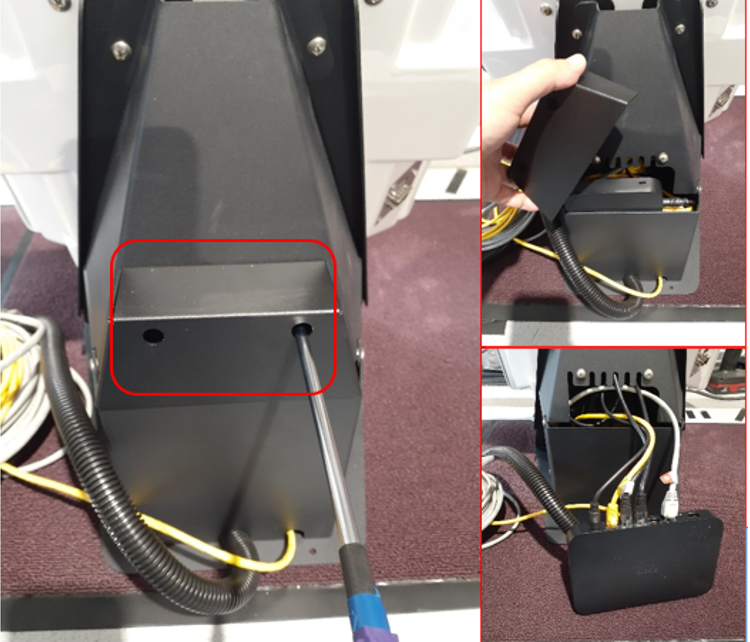
- Remove the screw shown here with a #2 Phillips screwdriver. Careful, the sound bar will fall if you are not supporting it.

- Place the sound bar to the side as shown below.

Remove Network and Power-Brick Cover
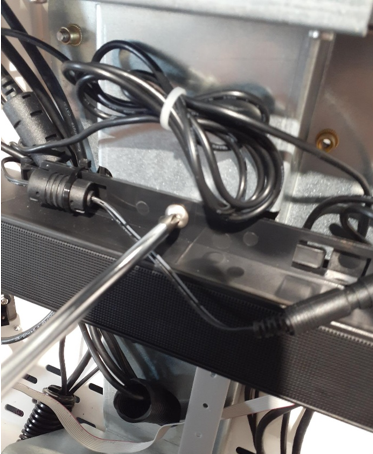
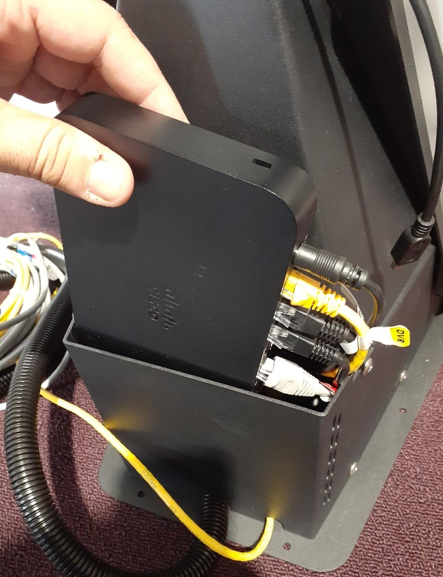
- Loosen the two screws shown below with a #2 Phillips screwdriver, remove the cover, and pull out the router. You do not need to unplug anything from the router.
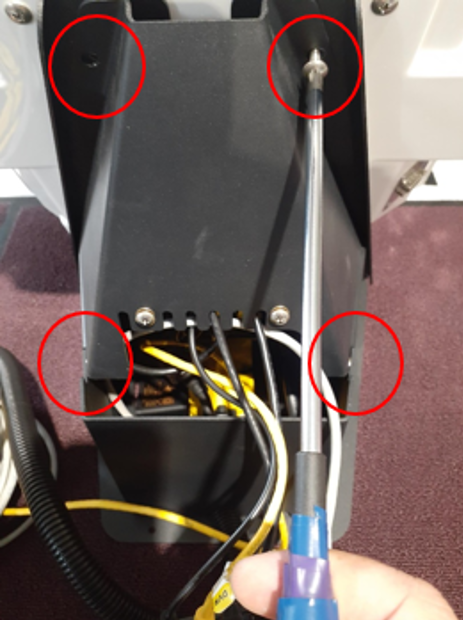
- Remove the four screws shown below with the same #2 Phillips screwdriver and lift the cover up and out to remove it.
Drill Hole if Needed and Run Power
- Depending on how old your kiosk is, you may have a hole already available to use. If not, drill a ¾”hole, ½” down from the center line of the two screws as shown below.
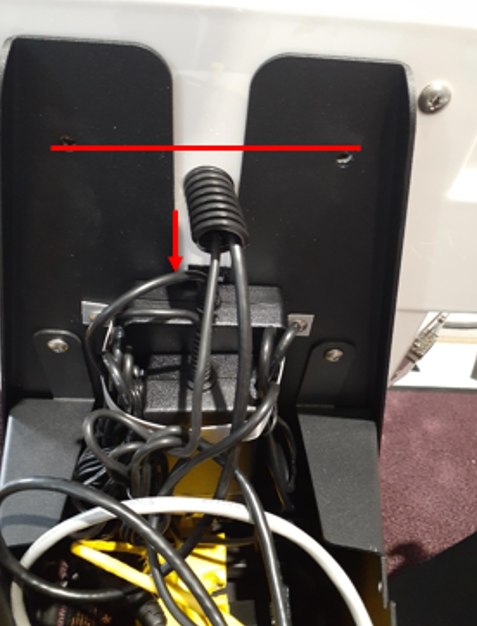
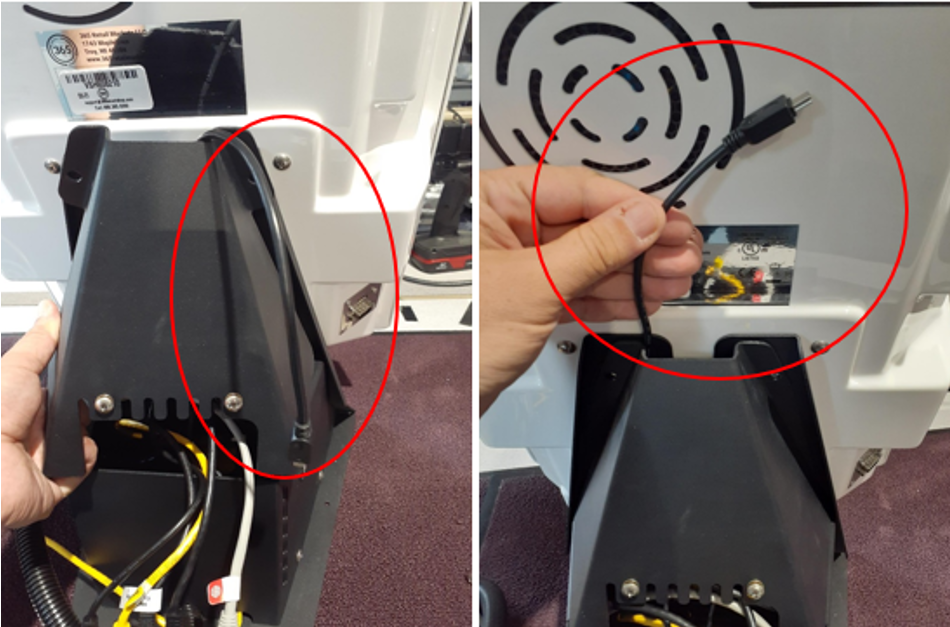
- Place the USB side through the hole and grab it from the other side of the kiosk. It will come out from behind the bracket where you removed the sound bar. Feed it carefully.

- Connect the USB where you disconnected the USB Gateway earlier. Make sure to tuck the wire into the slot in the bracket.
Replace Sound Bar and Split Loom
- Replace the Sound bar. Make sure to tuck the wires into the slots on both sides before tightening.
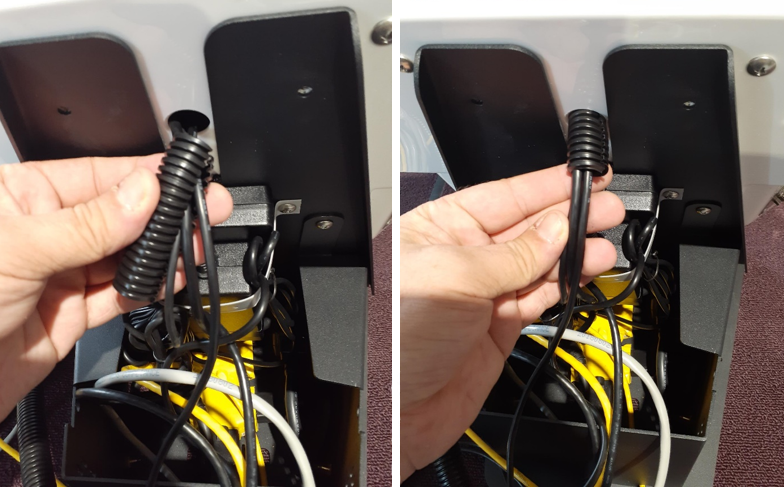
- Feed all wires entering that hole into the split loom as shown below. Feed the split loom into the hole so that half of the loom is located inside, and half is located outside of the hole.
Replace Back Metal
- When you replace the two back covers, make sure the Micro USB end is sticking out the top.
- Replace the router before fitting the Network cover.
Mount the New Gateway
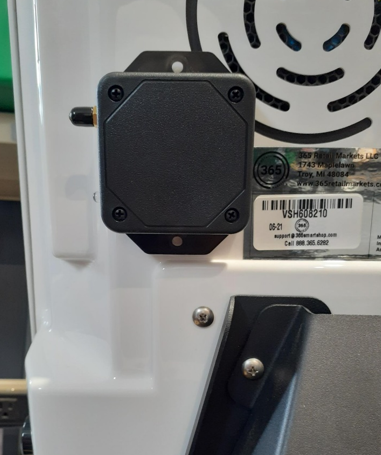
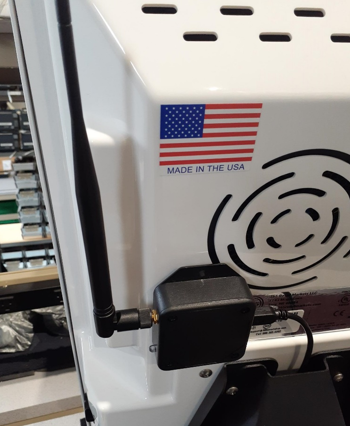
- Place Velcro on back of the Gateway and remove the film.

- Place the Gateway in the orientation shown below.
- Remove the plastic cap.
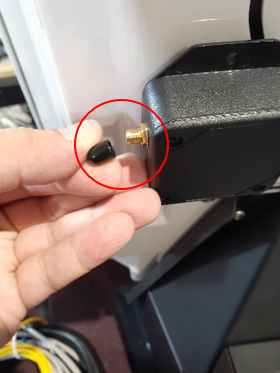
- Screw on the antenna.
- Place the wire clip, as it is shown below.
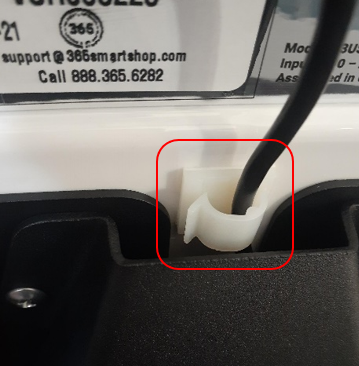
- Replace top two screws in the back of the kiosk to finish the job.