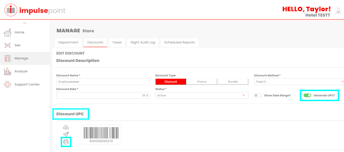
Users with Manager permissions can add or edit discounts and promotions in ImpulsePoint
To create a new discount or promo within ImpulsePoint, adhere to these steps:
-
Click on the "Manage" icon located on the left side of the screen.
-
Within the "Manage Store" section, select the "Add / Edit / Promos and Discounts" link.
-
Click the prominent red "ADD DISCOUNT/PROMO/BUNDLE" button and complete the following fields:
- Discount/Promo/Bundle Type (choose between Discount, Promo or Bundle)
-
Discount/Promo/Bundle Name
-
Discount/Promo Rate or Bundle Price
-
Discount Method (opt for Fixed $ amount or Fixed percentage)
-
Discount Rate
-
Status
-
Show Date Range
- If you enable this option by sliding the toggle, you can specify a date range, eliminating the need to manually manage the start and end dates for your discount or promo.
Generate UPC is available for Discounts to allow a discount to be applied at the Kiosk
- If you toggle this option on, ImpulsePoint will generate a UPC (Universal Product Code) that can be printed for efficient scanning at the kiosk.

-
-
Discounts apply to all items in the shopping cart, unless you add categories to exclude.
-
Promos apply to specific products, product categories, and/or product subcategories that you choose to associate with the promo.
-
Promos will apply automatically when the item is scanned at the kiosk or front desk.
- Bundle price will apply automatically when the items are scanned at the kiosk or front desk.
-
-
Don't forget to click "SAVE!"